Hexus Tip: Limit to 3 flows within a tour in order to keep the viewers’ attention. At the end of each flow, give viewers an option to go back to the start of the flow.
Creating multiple paths in the same tour
You can create a “Choose your own Adventure” tour with multiple paths for a more immersive experience for viewers.
To do so, capture all the screens you would like to include for each of the flows in the same recording. Watch the tour below to learn how you can create multiple paths within the same screen by adding multiple hotspots and linking it to the target screen:
Branching and linking to multiple tours
You can also create a branch for each feature or flow. Let viewers choose which tour to watch next so they can skip to the relevant features.
Creating a multi-flow tour
You can create a “playlist” of your flows by using our Multi-flow tours. To create a multi-flow tour,
- In your dashboard, select the Multi-flows tab.
- Click on “Create a multi-flow tour”
- Enter a title and select flows to add to your sequence. Make sure all these flows have public access. (To enable public access, you can go to the individual flow, and change settings in Share options.)
- Click “Create”.
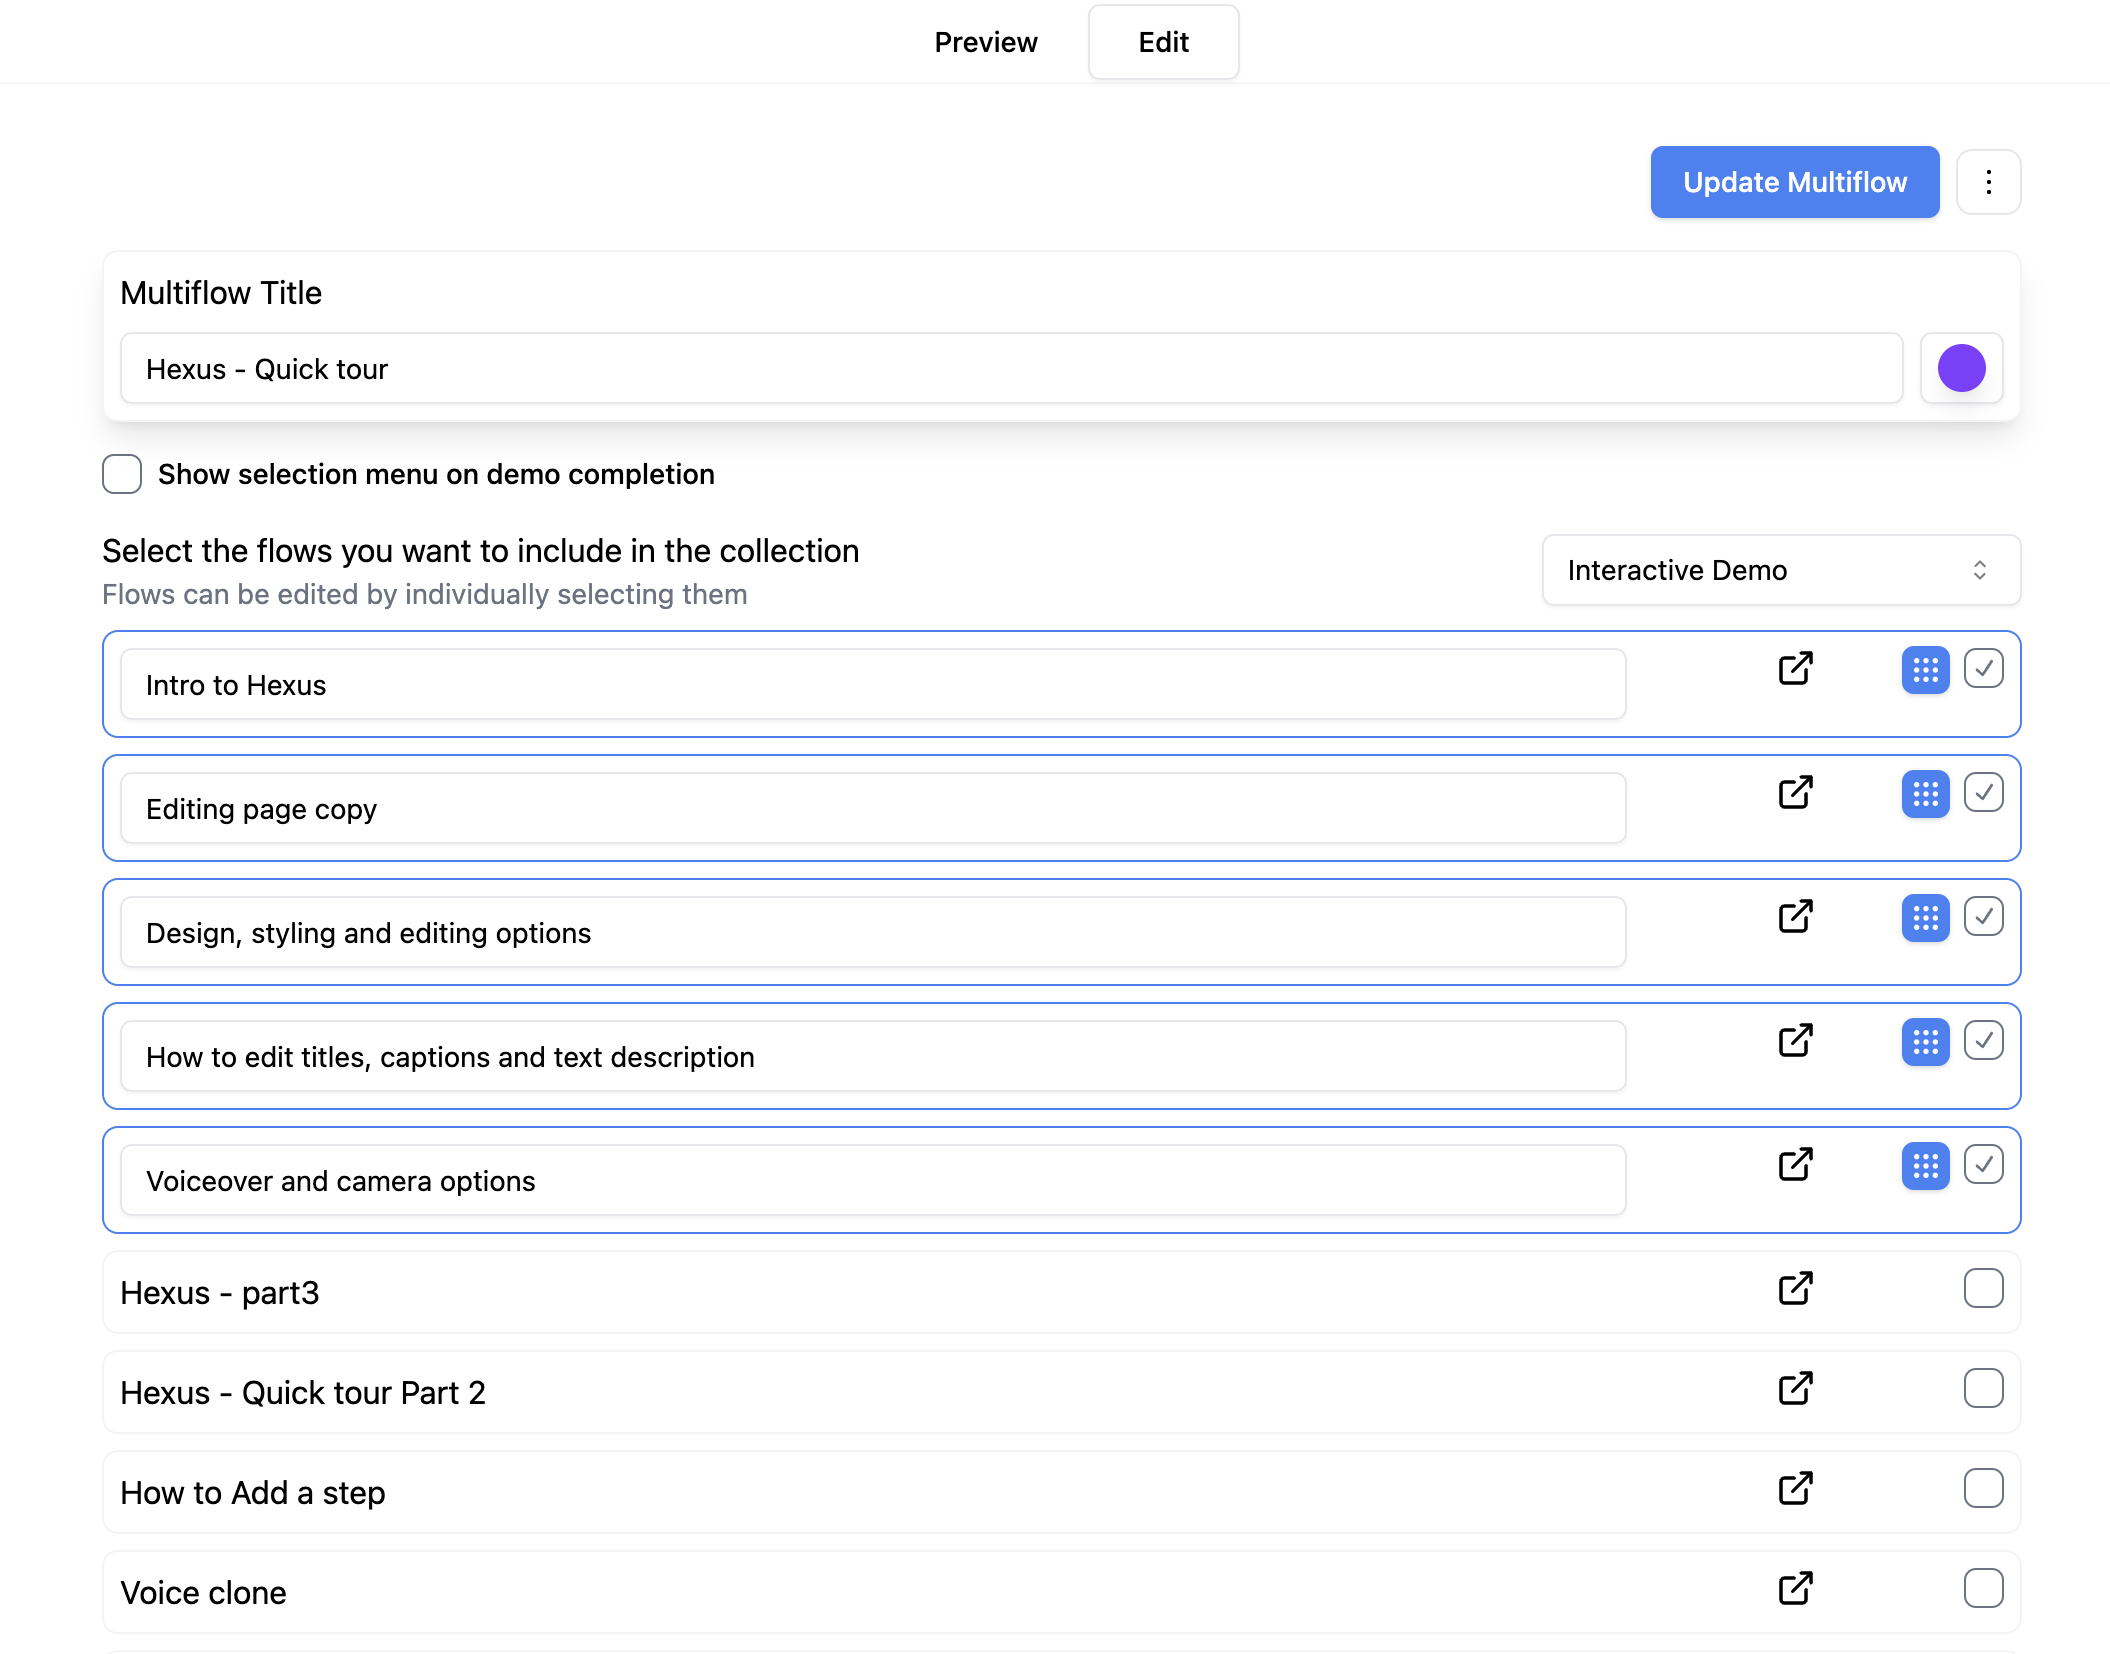
- Editing your multi-flow tour: You can go to the edit tab in your multi-flow tour and change the following elements:

- Title: You can name your multi-flow tour. This will appear on the CTA menu in the bottom left of your multi-flow tour.
- Color: This changes the color of the CTA menu in the bottom left of your multi-flow tour.
- Show selection menu on demo completion: This lets you preview the menu of tours after the end of every tour.
- Template dropdown: This allows you to display the flows in interactive demo or product demo video template.
- Select your flows: Add or remove flows by using the checkbox.
- Default Order of flows: You can drag and drop using the grid icon to change the order of the flows.
- Titles of individual flows: You can directly edit the titles of the individual flows when selected, to show how they would appear in the menu.
Dynamic personalization
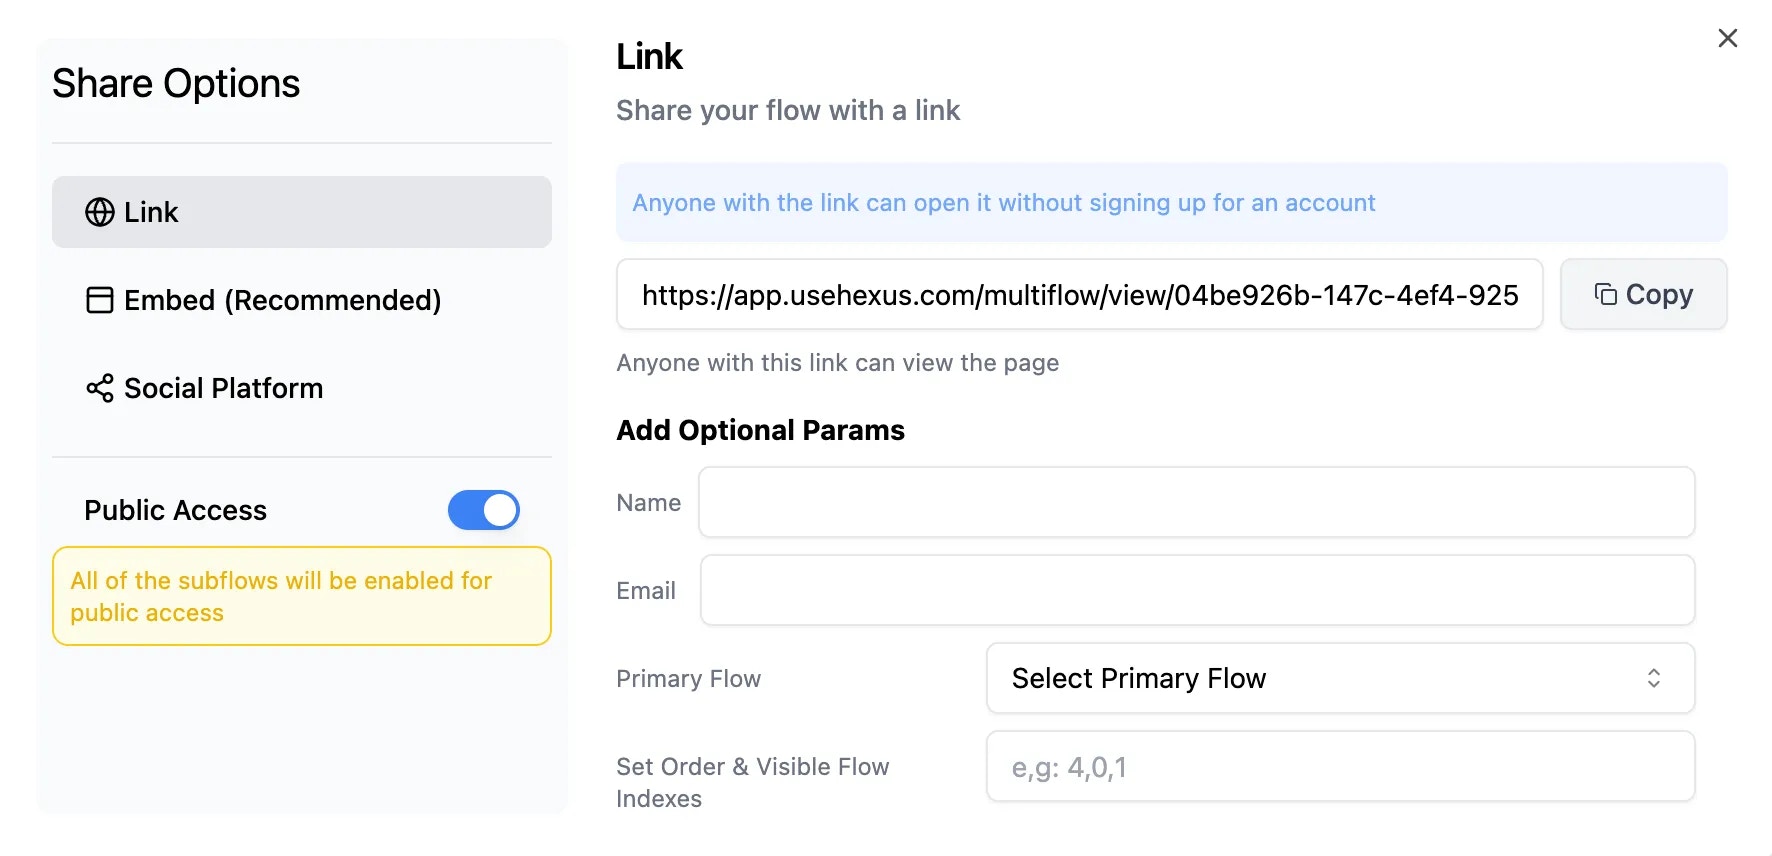
You can dynamically personalize the visibility, order, primary flow in your multi-flow tours using URL parameters when sharing your multi-flow tour:
- Add name and email variables: You can add and variables within your flow captions. To give them a value, you can use the name and email param fields in the Share modal.
- Primary flow: Simply select the primary flow from the list of flows, to define the default visible flow.
- Order and visibility: To set the order of your flows from the list, enter it into the field separated by a comma. You can hide flows from your list by excluding them from this field. Select a primary flow to display the default flow - it is exclusive from the order you set. Note that the first flow in the list is indexed as 0, second flow as 1, third as 2, and so on. So for example, in a list of 10 flows, if you want to display the fourth, second, and seventh flow, you would enter 3,1,6.


